|
"Canned vegetables" refers to vegetables packed in airtight tins, bottles and jars. Like all canned foods, canned vegetables have always been popular because they are either cooked or processed and are hence considered safe for health and nutritious.
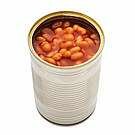 Different varieties of canned vegetables are available in the market and while buying, you need to choose them according to the dish you want to serve up. Thus, while you will find some of the juiciest and tenderest of vegetables for salads, you will also come across some mature vegetables that make soups, stews, and casseroles the treat they are! Different varieties of canned vegetables are available in the market and while buying, you need to choose them according to the dish you want to serve up. Thus, while you will find some of the juiciest and tenderest of vegetables for salads, you will also come across some mature vegetables that make soups, stews, and casseroles the treat they are!
This is only to speak of canned vegetables being marketed by business bodies or commercial ventures. Have you ever thought of canning some homegrown vegetables? If your answer is in the affirmative, then its time that you give it a try now because here we are briefing you on all that you need and things you need to do to successfully PROCESS and CAN your back-garden grown vegetables for later use.
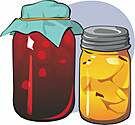
Since you will be canning vegetables, you will need defect-free cans or jars or bottles with lids to ensure airtight sealing. Quart size jars or cans will be best but you can also use pint or half-pint cans. Wash and rinse them thoroughly.
 You will also need a Pressure-Canner. Choose a Pressure-Canner that has a tight-fitting lid, an accurate pressure gauge and a safety valve. Opt for a Pressure Canner that can hold four or more quart jars. Make sure that the exhaust vent is perfectly clean. You will also need a Pressure-Canner. Choose a Pressure-Canner that has a tight-fitting lid, an accurate pressure gauge and a safety valve. Opt for a Pressure Canner that can hold four or more quart jars. Make sure that the exhaust vent is perfectly clean.
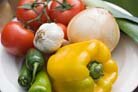
A word of caution for you all readers before we go ahead with other details - the sooner you are able to can the vegetables after picking them from the garden, the better. Of course, you will need to thoroughly wash the vegetables, cleaning every bit of dust. Never let the vegetables soak water because that will lead to loss of flavor and nutrients.
Before canning the vegetables, you will need to sort them according to size and maturity. As regards packing, you have two choices - you can either pack them raw or after steaming them. For raw packing, you will need to fill cold, raw vegetables into cans and cover them with boiling water. Hot packing requires you to cook or steam vegetables before filling them into a can. You will need to pour boiling water or cooking liquid over the cooked vegetable in hot packing too. (You will need to leave enough space between the top layer of the food and the lid because this space is very vital to achieve good airtight sealing).
 Your cans are now ready to go into the Pressure Canner for being processed. Pour 2 to 3 inches of hot water in the canner and position the filled cans on the rack. Fasten the canner lid securely. Remove the weight and let the steam escape for about 10 minutes and this will drive out trapped air. Place weight on vent port and let the canner pressurize. Your cans are now ready to go into the Pressure Canner for being processed. Pour 2 to 3 inches of hot water in the canner and position the filled cans on the rack. Fasten the canner lid securely. Remove the weight and let the steam escape for about 10 minutes and this will drive out trapped air. Place weight on vent port and let the canner pressurize.
The ideal pressure required at sea level is 10 pounds. For each 1000 feet elevation above sea level, you will need an extra 1/2-pound of pressure. Similarly, a heat setting of 240º F is crucial to processing vegetables, because only such a high temperature can destroy bacteria causing botulism.
Remove Pressure Canner from heat when the cooking process ends. Depressurize the canner. Remove weight when pressure inside the canner becomes zero and open the lid.
Carefully remove cans/jars from the canner and place them in dry, moisture-less place for almost a day. Test the seals on the can lids; label your canned vegetables and store them in some clean, cool, dry, well-ventilated corner.
With your garden-picked vegetables canned, you can surely laugh your way to health!
|